Headings
Why use headings?
Headings are the formal way of indicating different sections in a document. This applies to everything from papers written in Word or Google Docs to webpages to software documentation.
Proper headings are more than just visual indicators of sections. Using them provides:
- Accessibility - screen readers know about headings and how to navigate with them. This lets folks using screen readers easily navigate the document. They can’t do this using bold or capitalized text.
- Easier navigation for everyone - as with many improvements to access headings make everyone’s life easier. Using headings makes it possible to add tables of contents and these are often auto generate by systems like Word, Google Docs, pdfs, and websites (see that nice table on contents on the right side of this webpage? That’s thanks to the headings!). This makes it much easier for everyone to navigate jump around in the document. It also lets you link directly to individual sections (e.g., to ask a collaborate to comment on a subsection of the Methods or direct users to part of a webpage)
- It’s easier to keep consistent heading formatting. Manually formatting headings means that if you decide to change the heading style in one place you have to manually change it in all of the other places. Using proper headings let’s you just change it once and it will show up everywhere.
How to use headings?
Google Docs
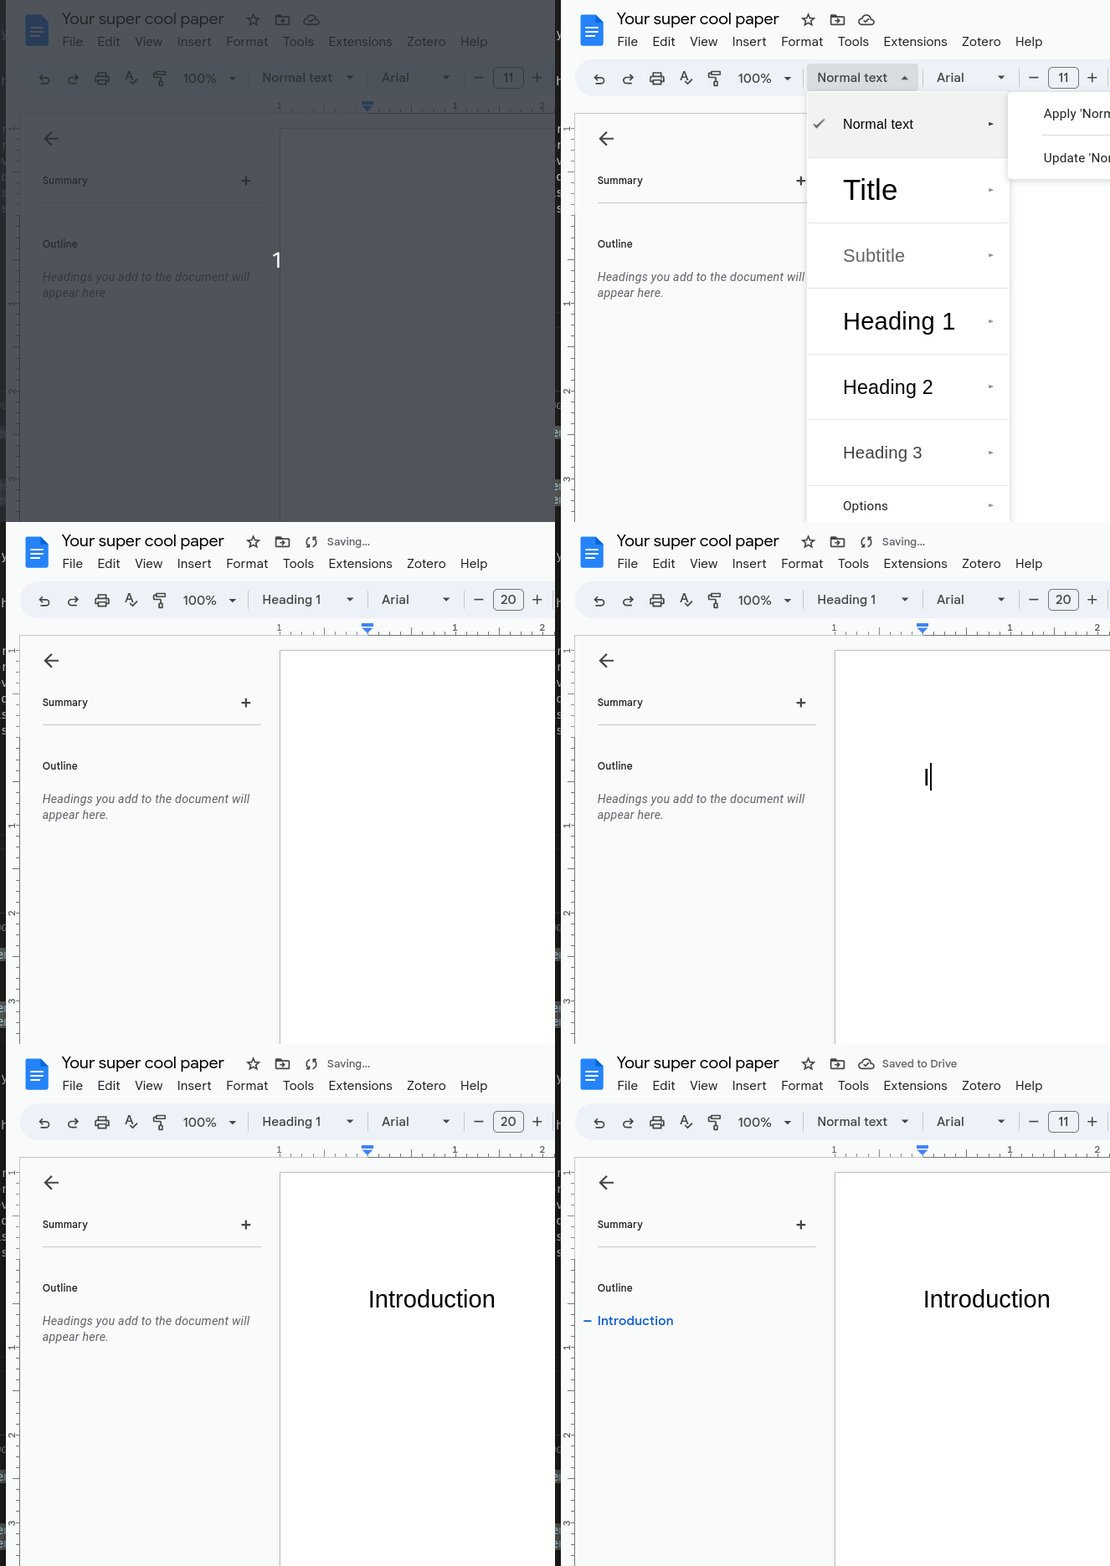
Creating a heading
- In the main bar click on the dropdown that says
Normal textand select the heading level you want to use - Type your heading
- Hit enter and the next line will be set back to normal text

A handy way to make sure you’ve picked the right heading level is to check the outline bar to make sure your new heading is nested appropriately.
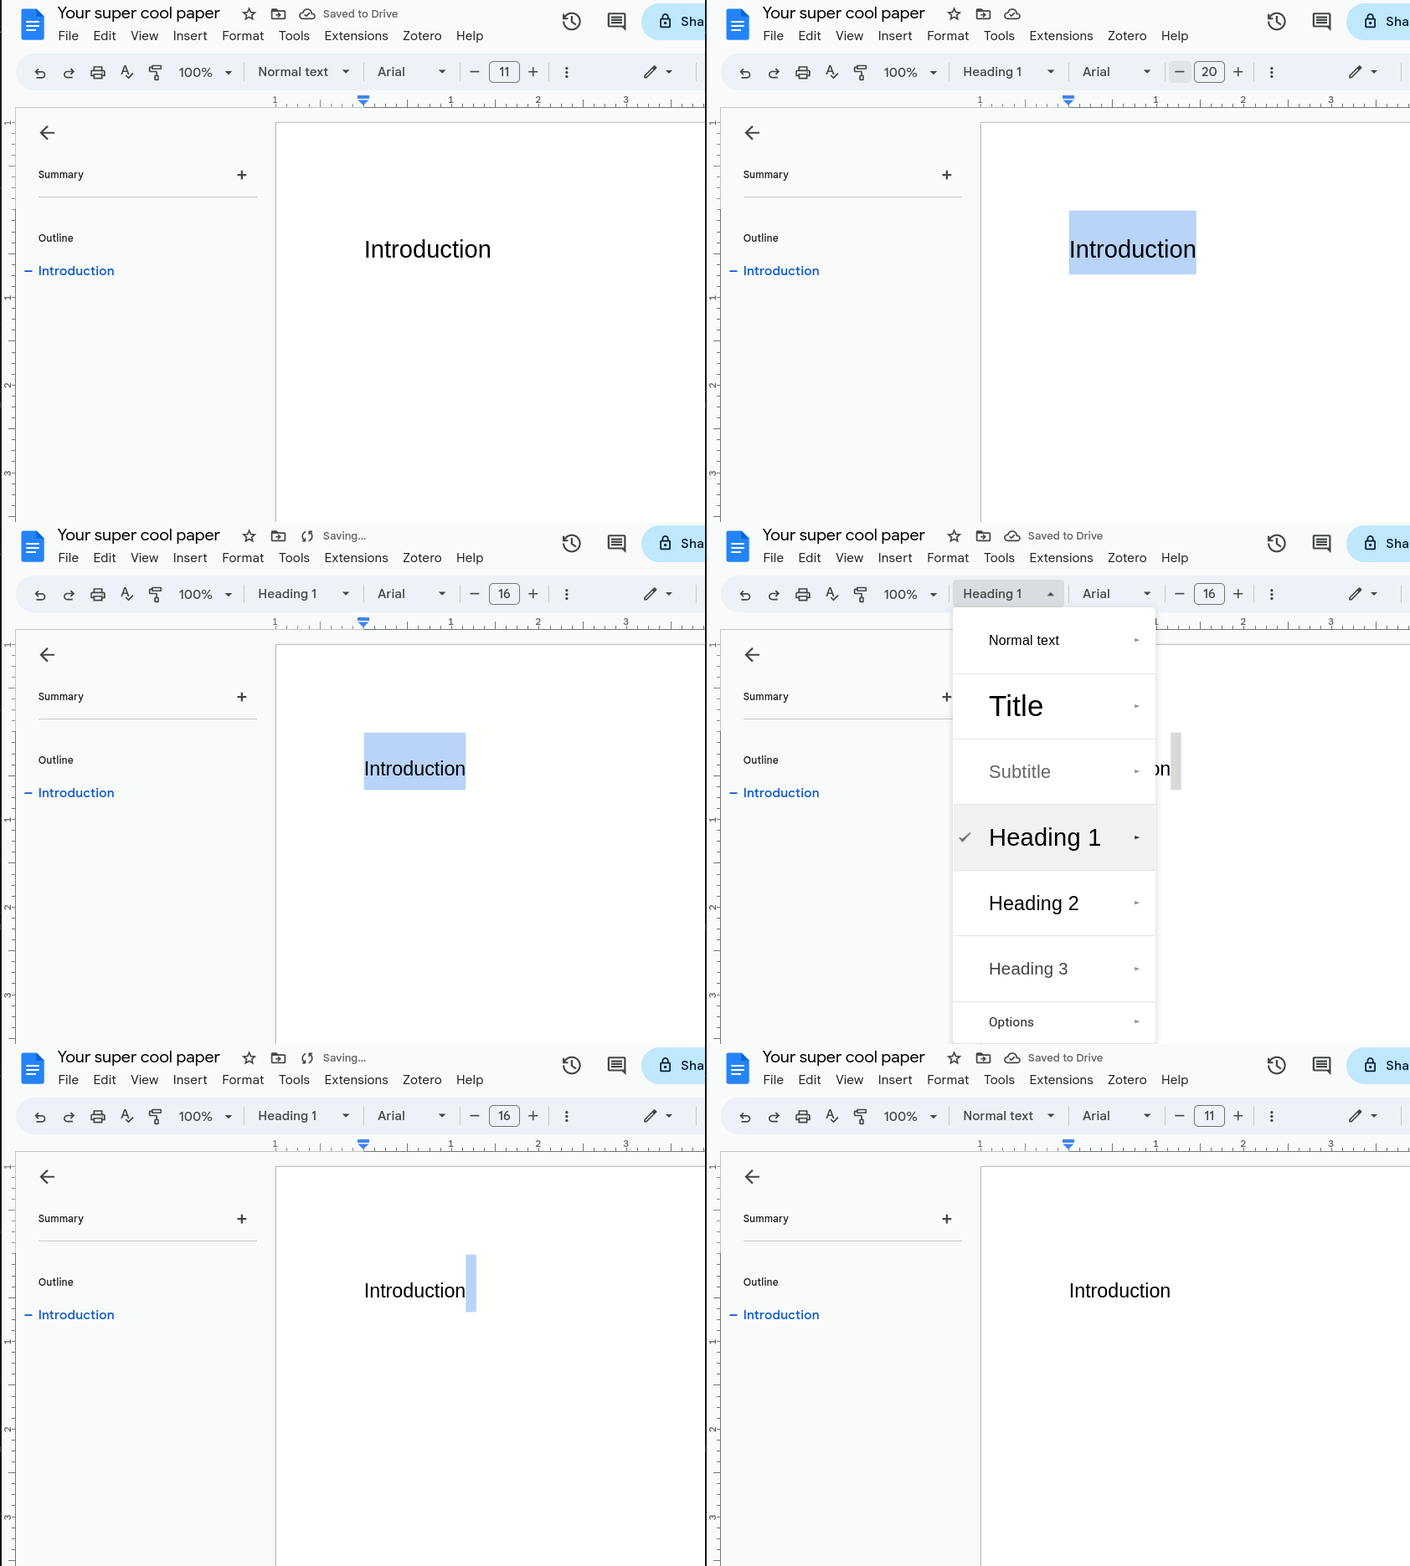
Changing the visual formatting for a heading
- Highlight a heading of the level that you want to change
- Change the format as desired by changing fonts, font sizes, bold, italics, etc.
- Click the heading dropbox
- Hover over the current heading level
- Select ‘Update Heading to match’
